
Virtual Machines on Android #
The Android Virtualization Framework (AVF) was introduced with Android 13 on Google Pixels. This AVF is a technology that will allow hosting virtual machines to execute code in isolation from the rest of the system.
On Android 15, Google integrated the Terminal application which is based on this AVF framework. Activatable via the developer menus, this application downloads a Debian VM and connects to it once launched. With this application, we will be able to run a Linux environment on our phones! Terminal is still experimental on this version of Android but already quite functional. And good news, the VM is connected to the phone’s network!
This gives me a few ideas:
- Can we connect an ADB client from the VM and thus launch commands without going through another device?
- Can we create an SSH connection with the VM?
Demonstration #
In this article, we will first see how to activate the Terminal application and its Debian VM.
Then, to avoid depending on a USB connection or a WiFi hotspot, we will activate the ADB connection over the IP network. In addition to the USB method, which requires a PC, I will detail an alternative method via WiFi, which does not require any other device except a WiFi connection.
And finally, with this local ADB connection established, I will present a small use case by exposing the Debian VM’s SSH server to the outside world.
Warning
Throughout this process, make sure that the WiFi network your device is connected to is safe. The following manipulations expose your phone and your data to attacks. When you no longer need these functions, make sure to disable them.
See Reset
Accessing the Terminal application #
To use the Terminal application, you must enable the option in the developer settings (I’ll let you search online if you don’t know how to access them).
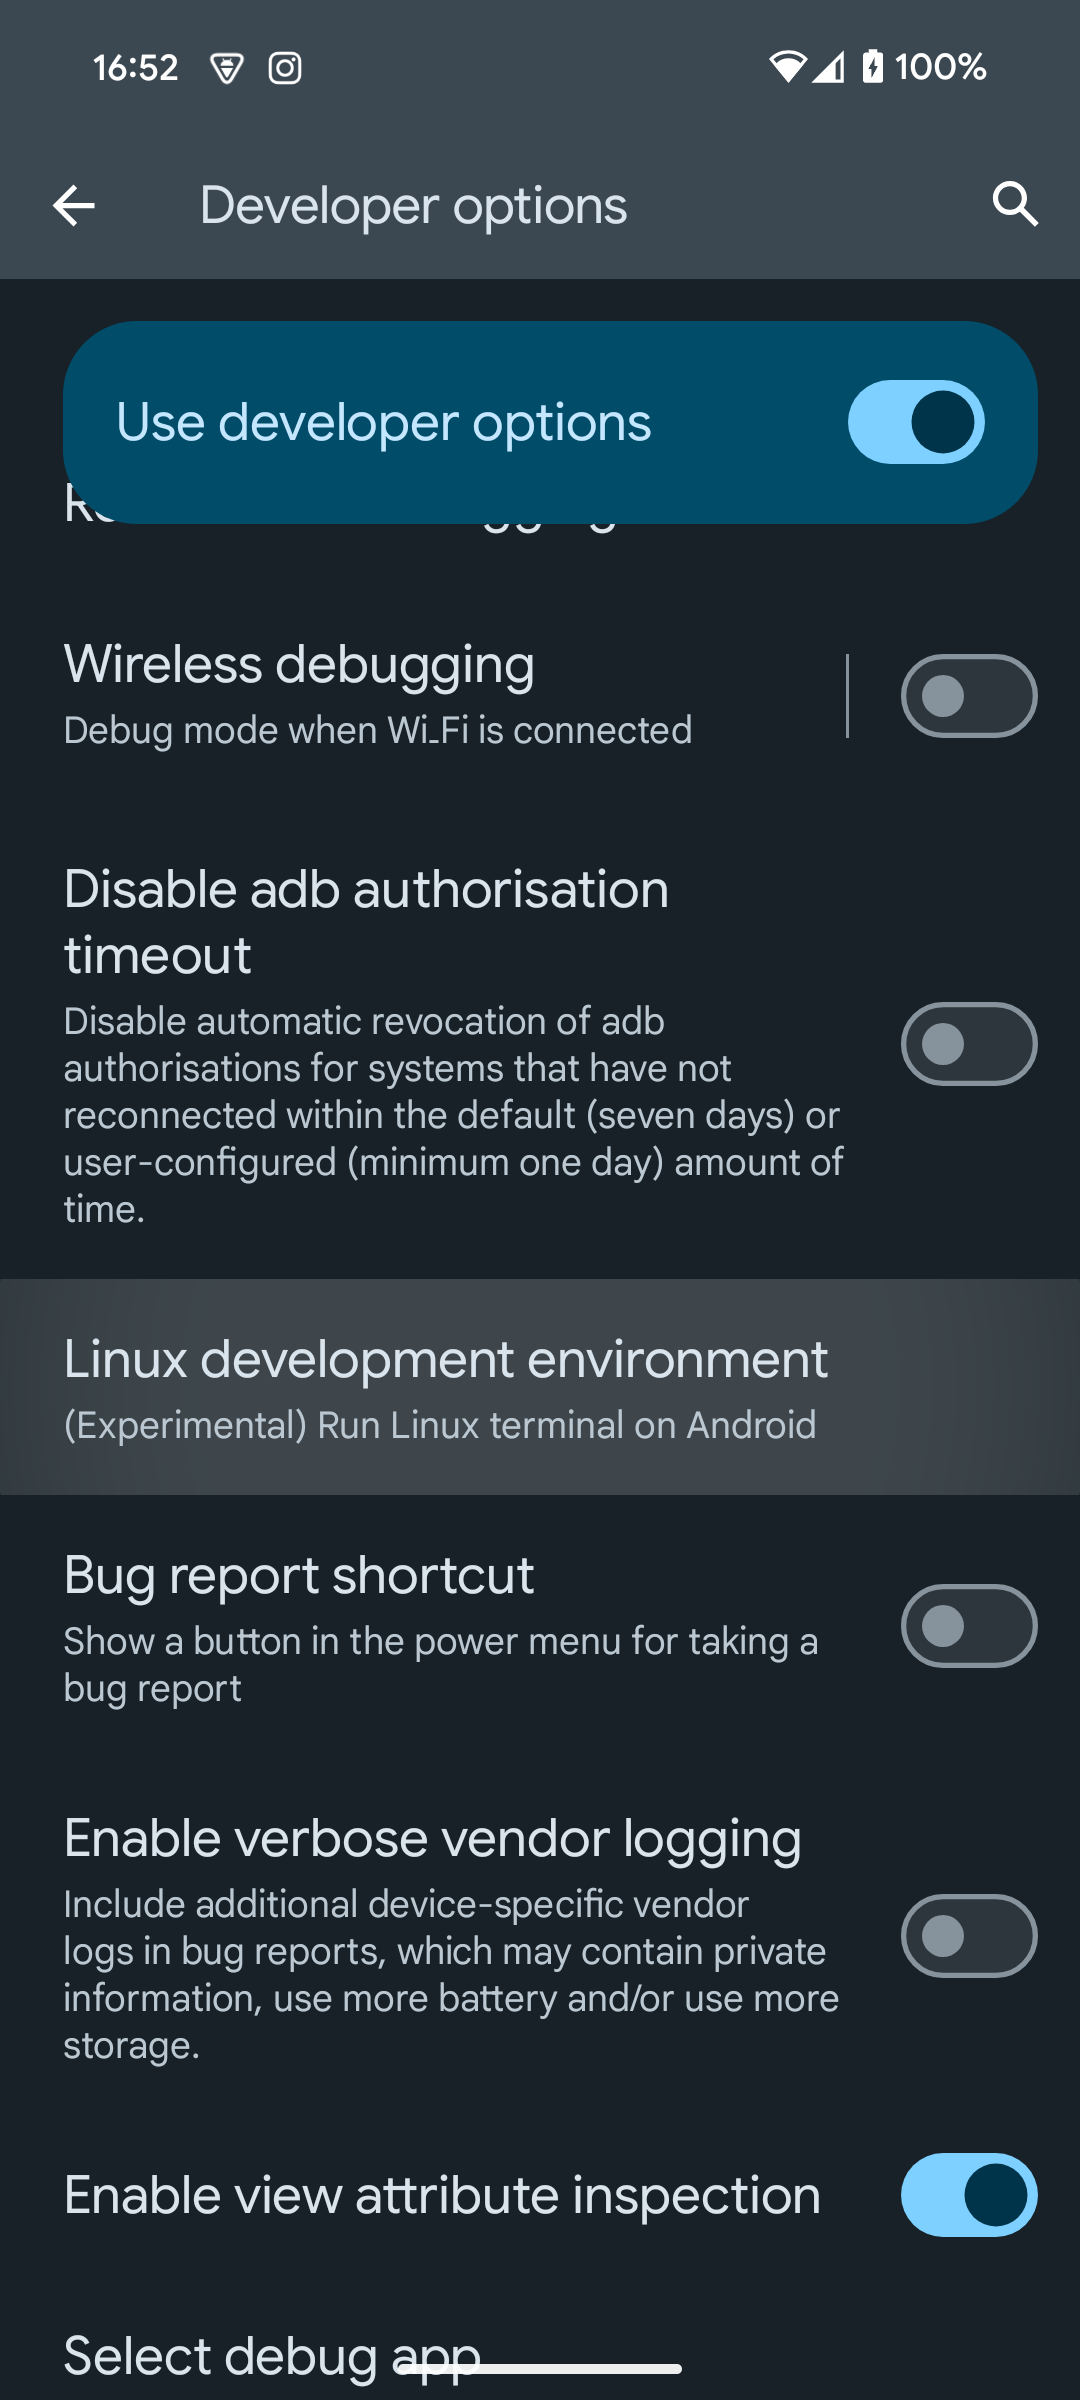
This will make a new application accessible. When launched, it will take some time to initialize, as it needs to download the VM.
Sometimes the application encounters an error. Before going through recovery, I advise you to restart the application.
Activating Network ADB #
We will activate the ADB connection on the IP network. By default, this method is disabled for security reasons. There are 2 ways to achieve this. The classic one via USB, but it requires a PC. Or the one via WiFi, which has the advantage of not requiring a PC. However, it does require a WiFi connection to activate the option in the developer menus and to download a recent ADB binary to use the pairing function. Indeed, the binary from the Debian repo is too old (29.0.6) and the pairing function is only included from 30.0.0.
WiFi Method #
ᐅ Download a recent adb binary:
For arm64:
wget https://github.com/rendiix/termux-adb-fastboot/raw/refs/heads/master/binary/arm64-v8a/bin/adbFor x86_64:
1wget https://dl.google.com/android/repository/platform-tools-latest-linux.zip
2unzip platform-tools-latest-linux.zip
ᐅ Connect the phone to a trusted WiFi hotspot
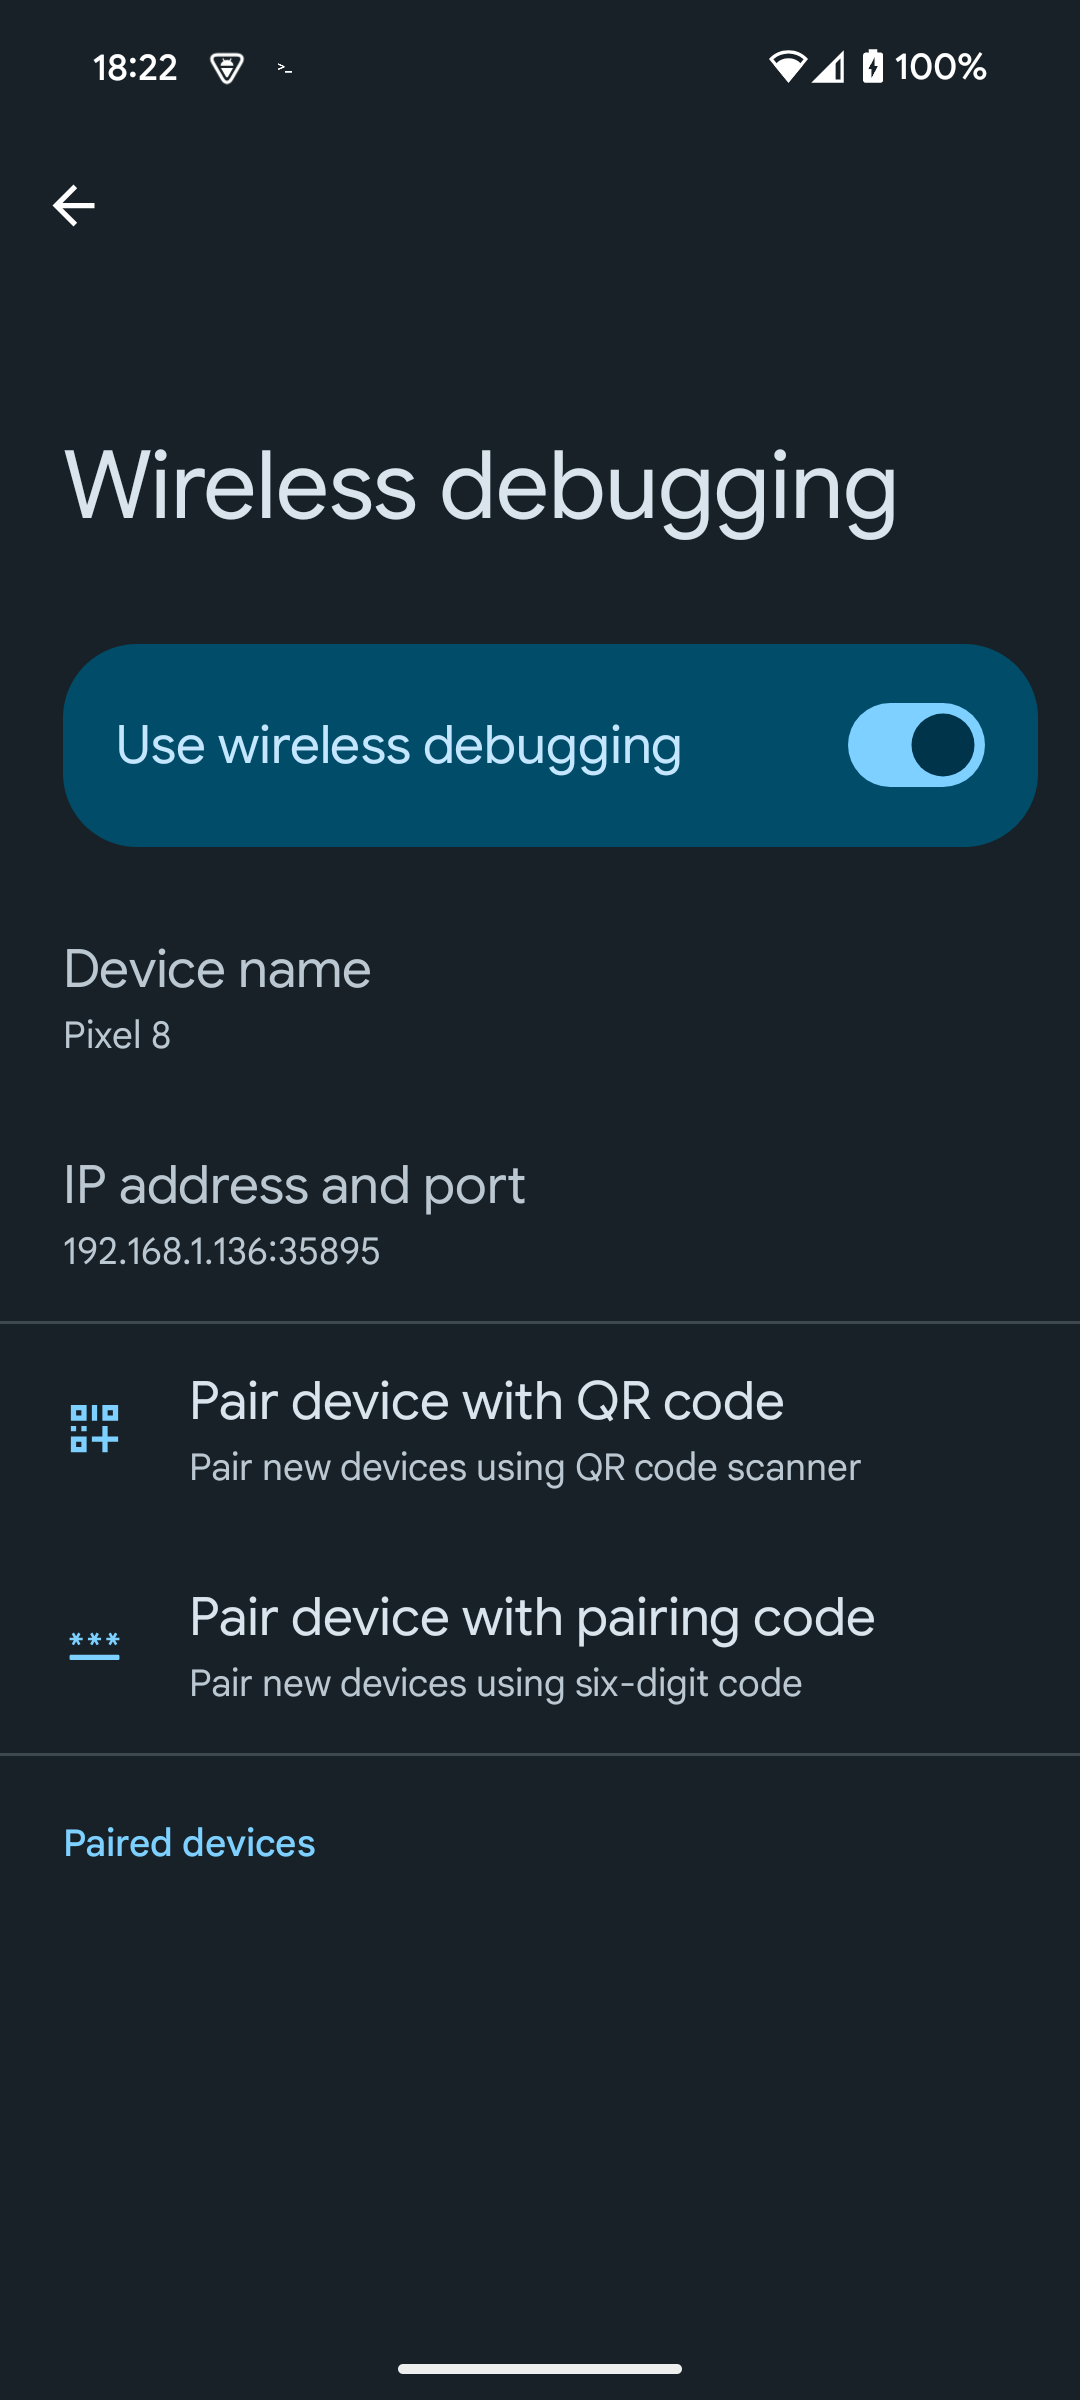
ᐅ Go to developer settings and enable wireless debugging
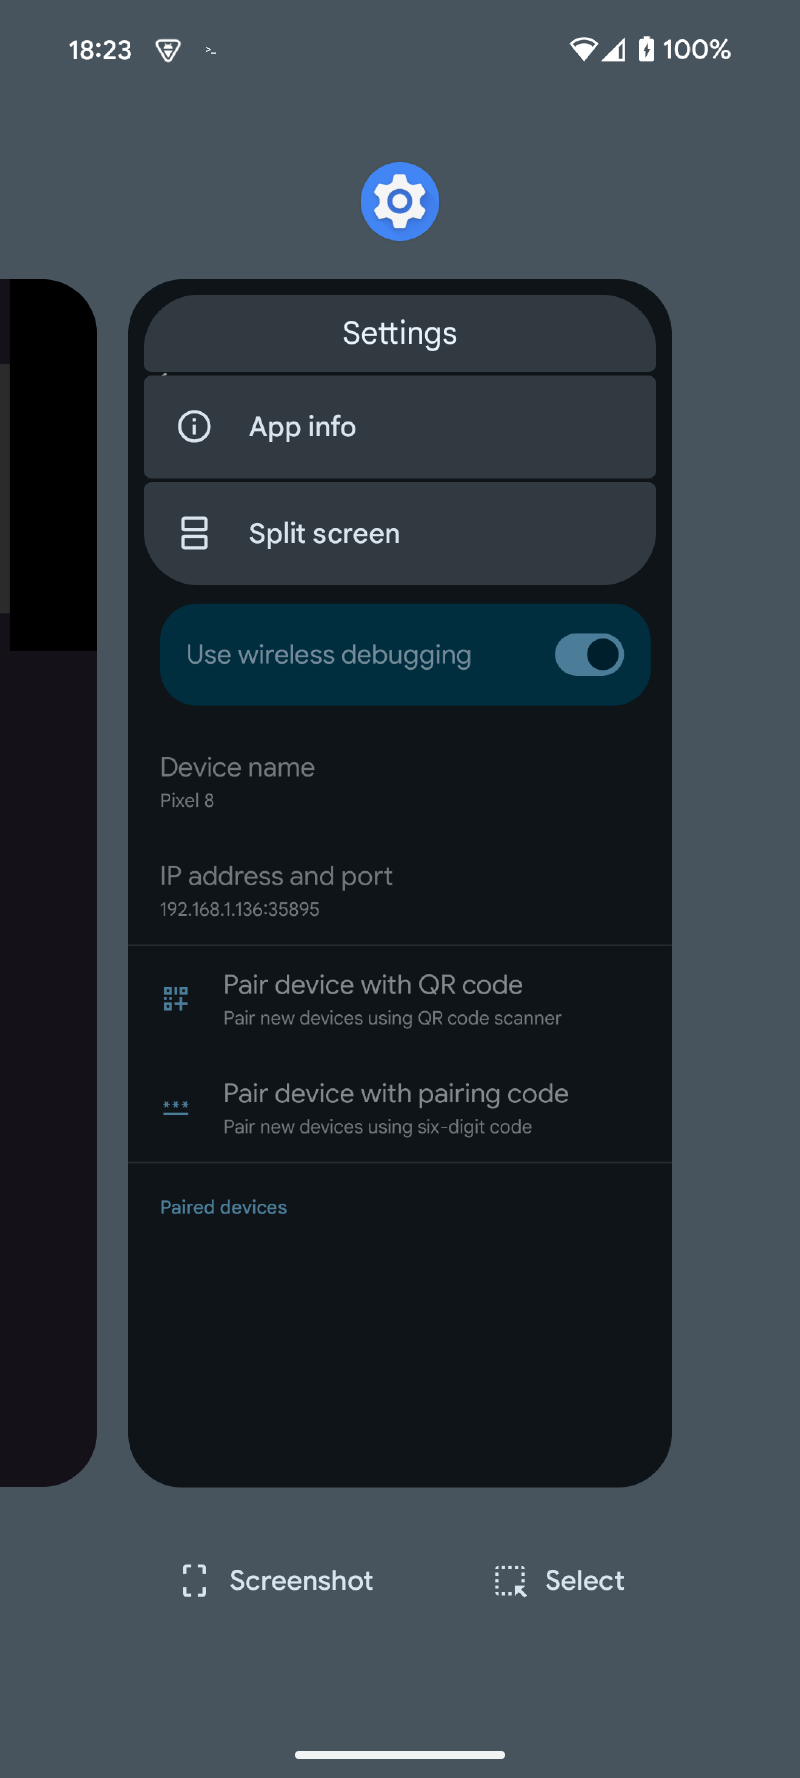
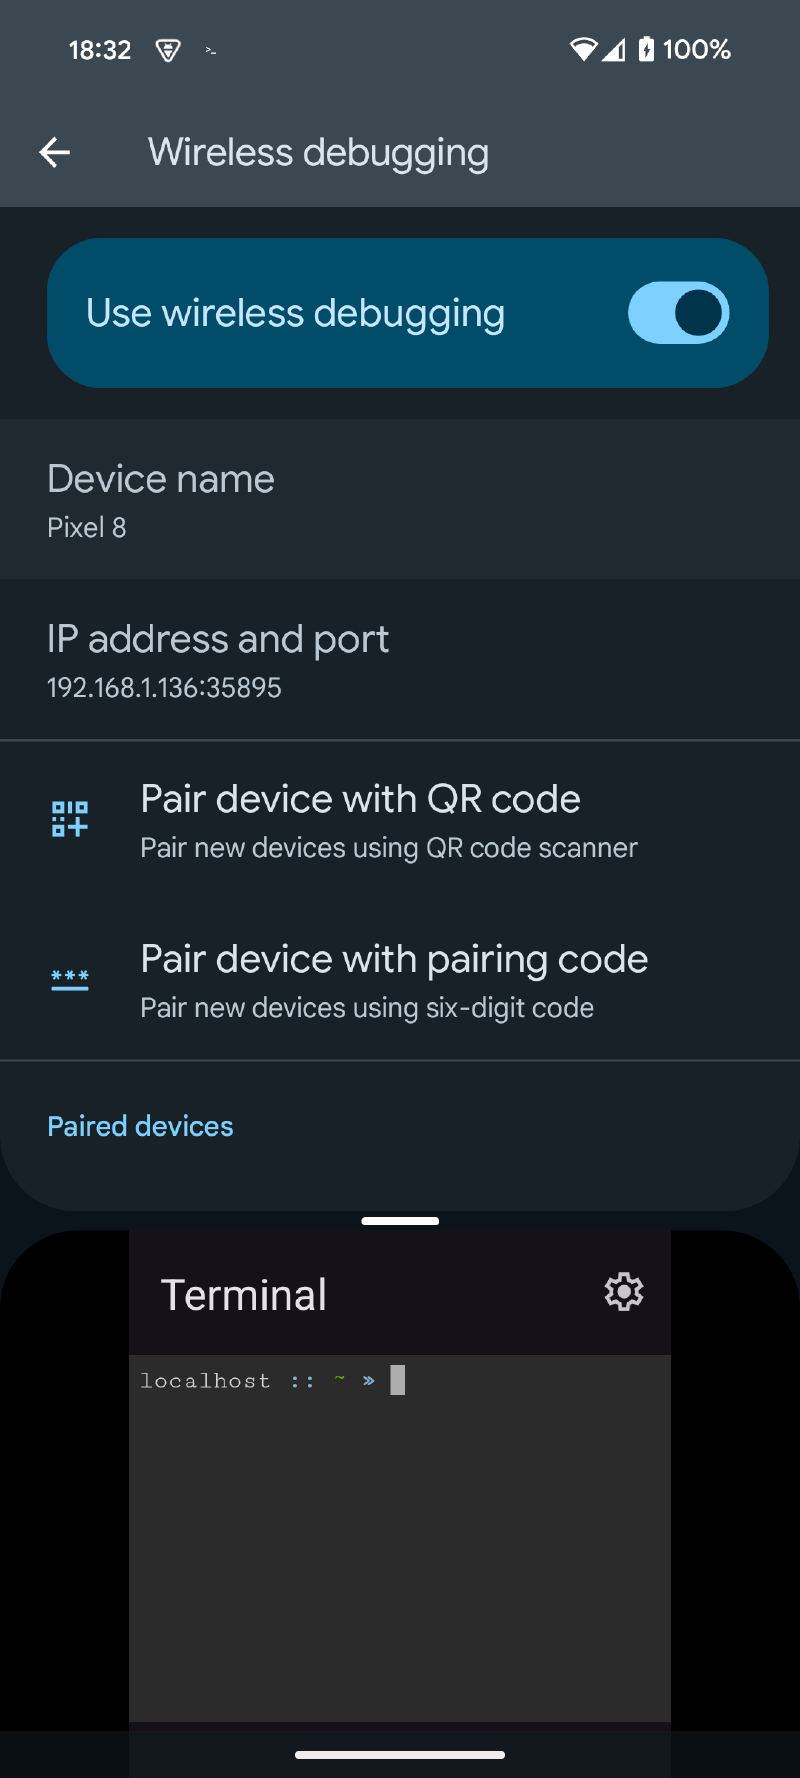
ᐅ To keep the pairing window active, split the screen with the terminal app occupying 2/3 of the screen
 |
 |
|---|
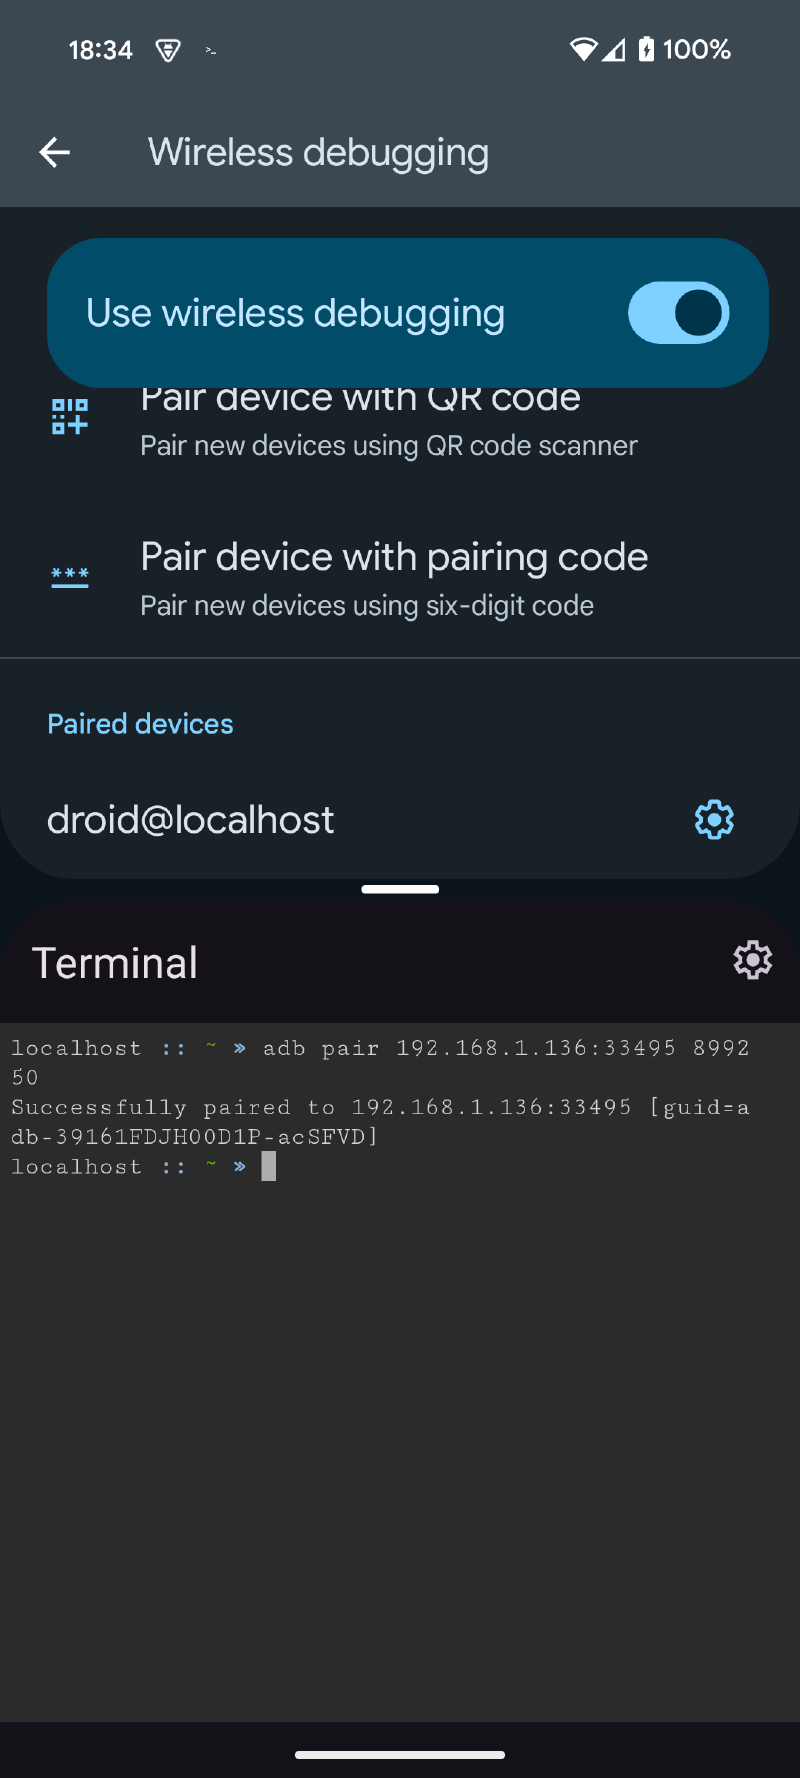
ᐅ Start pairing in the Settings app and execute the command with the information provided in the Terminal app
// Usage
adb: usage: adb pair HOST[:PORT] [PAIRING CODE]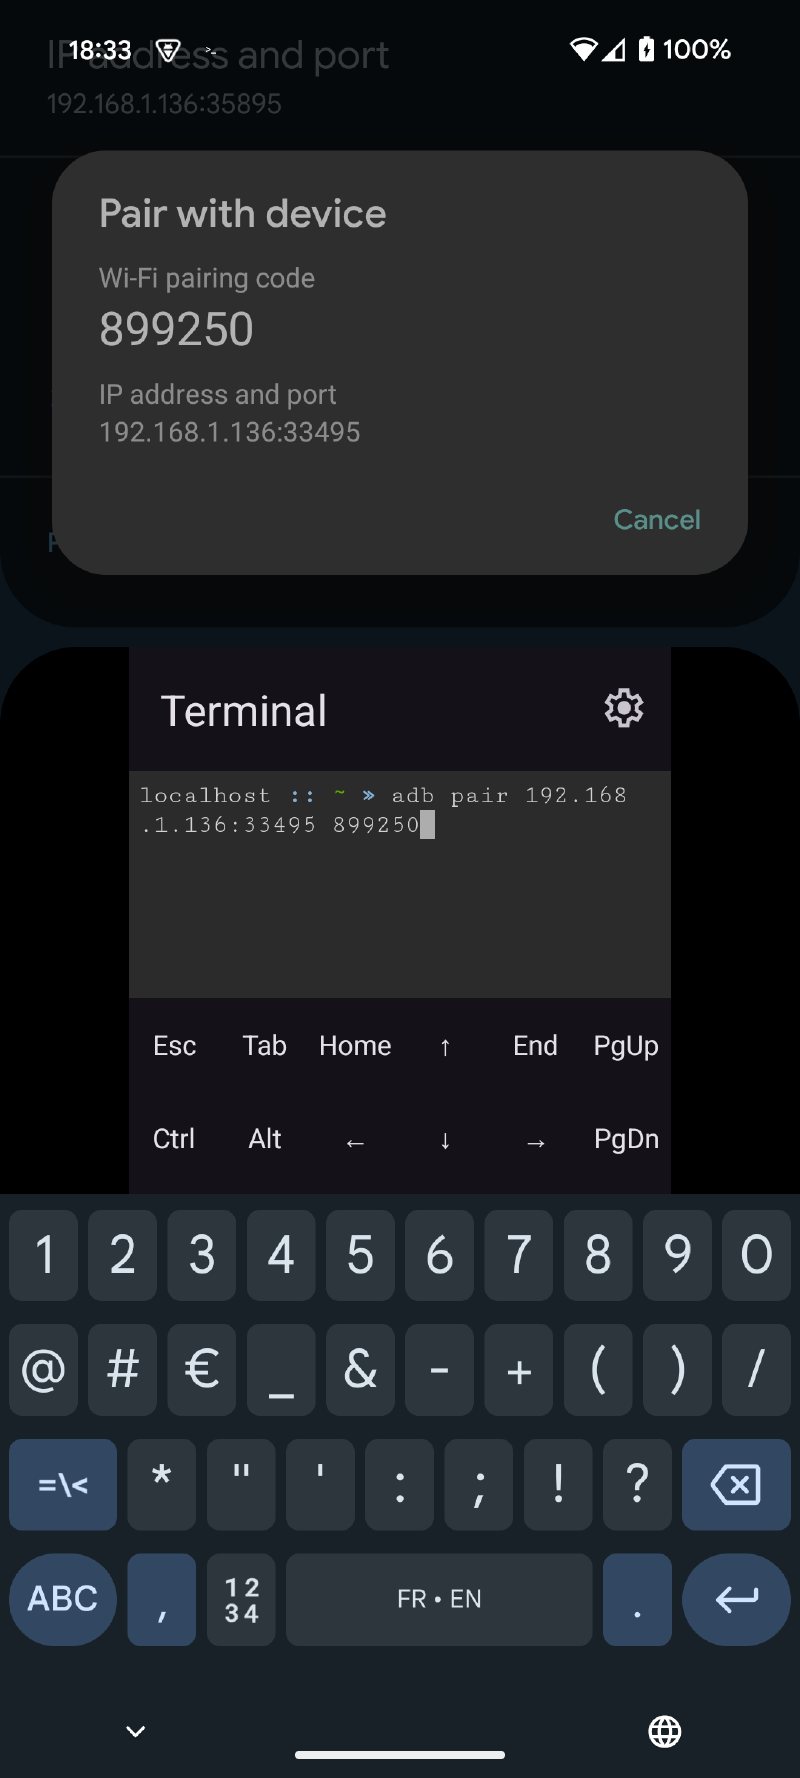 |
 |
|---|
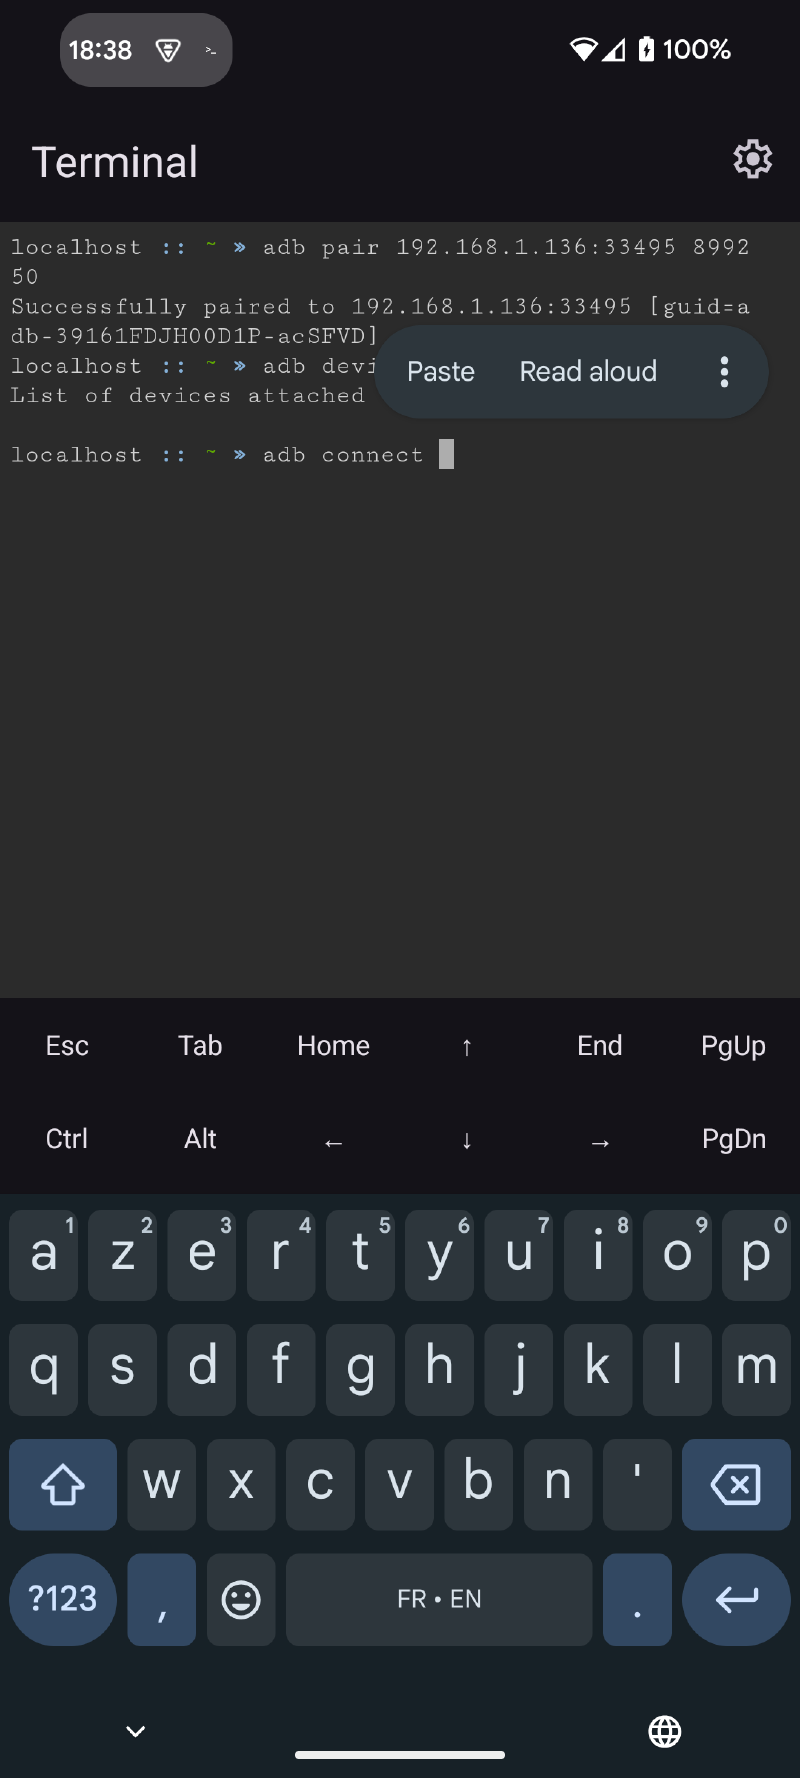
ᐅ Once paired, connect with adb connect and the information provided by the Settings application. The copy-paste function is useful here.
 |
 |
 |
|---|
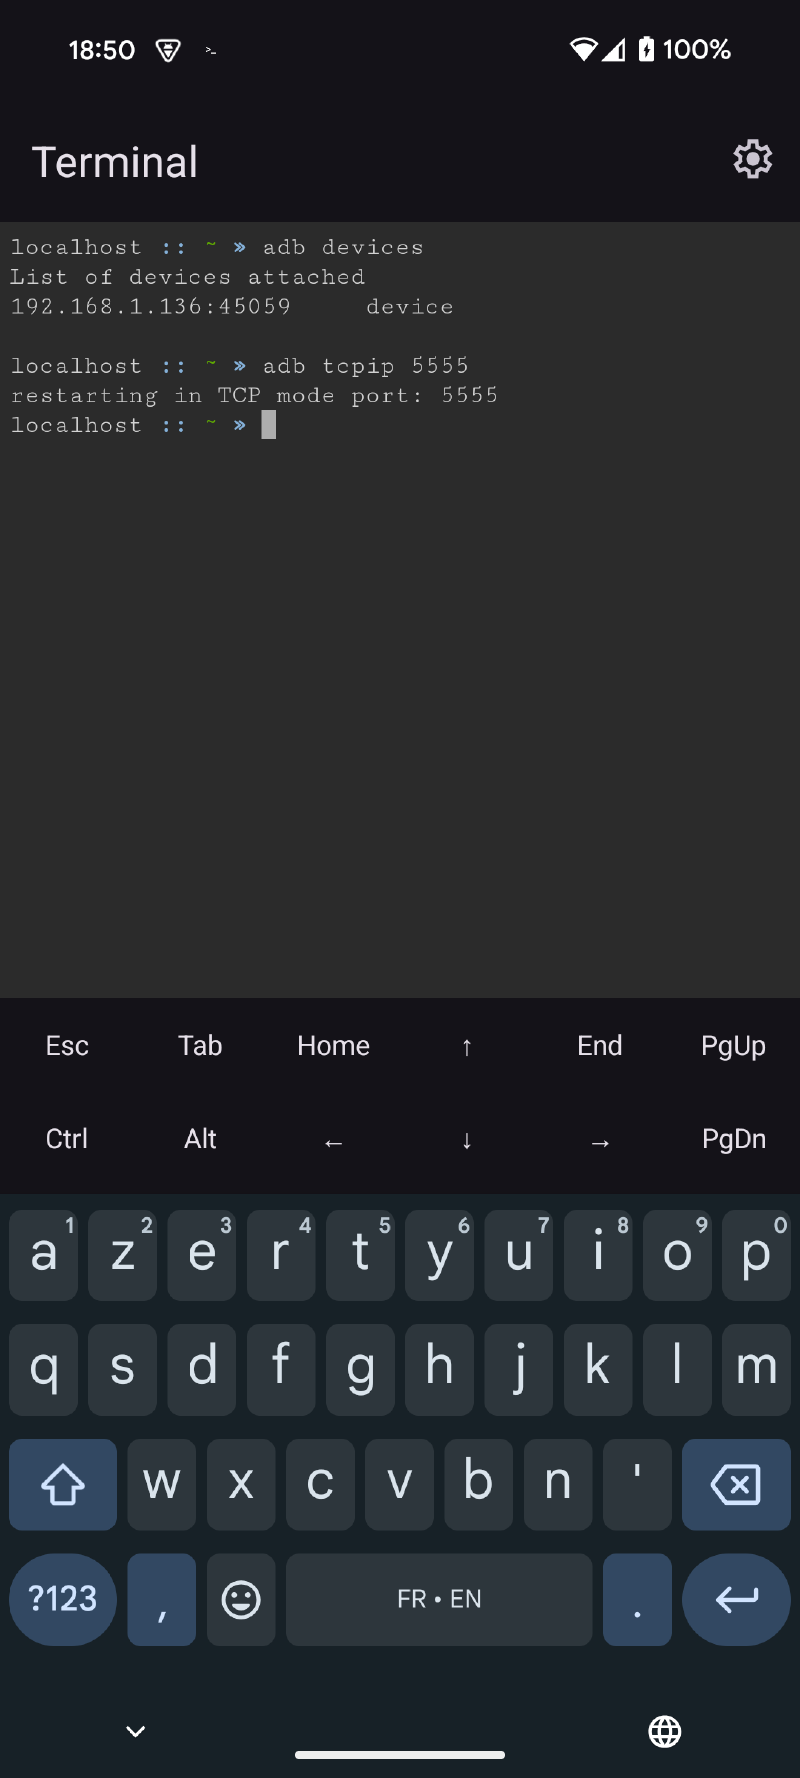
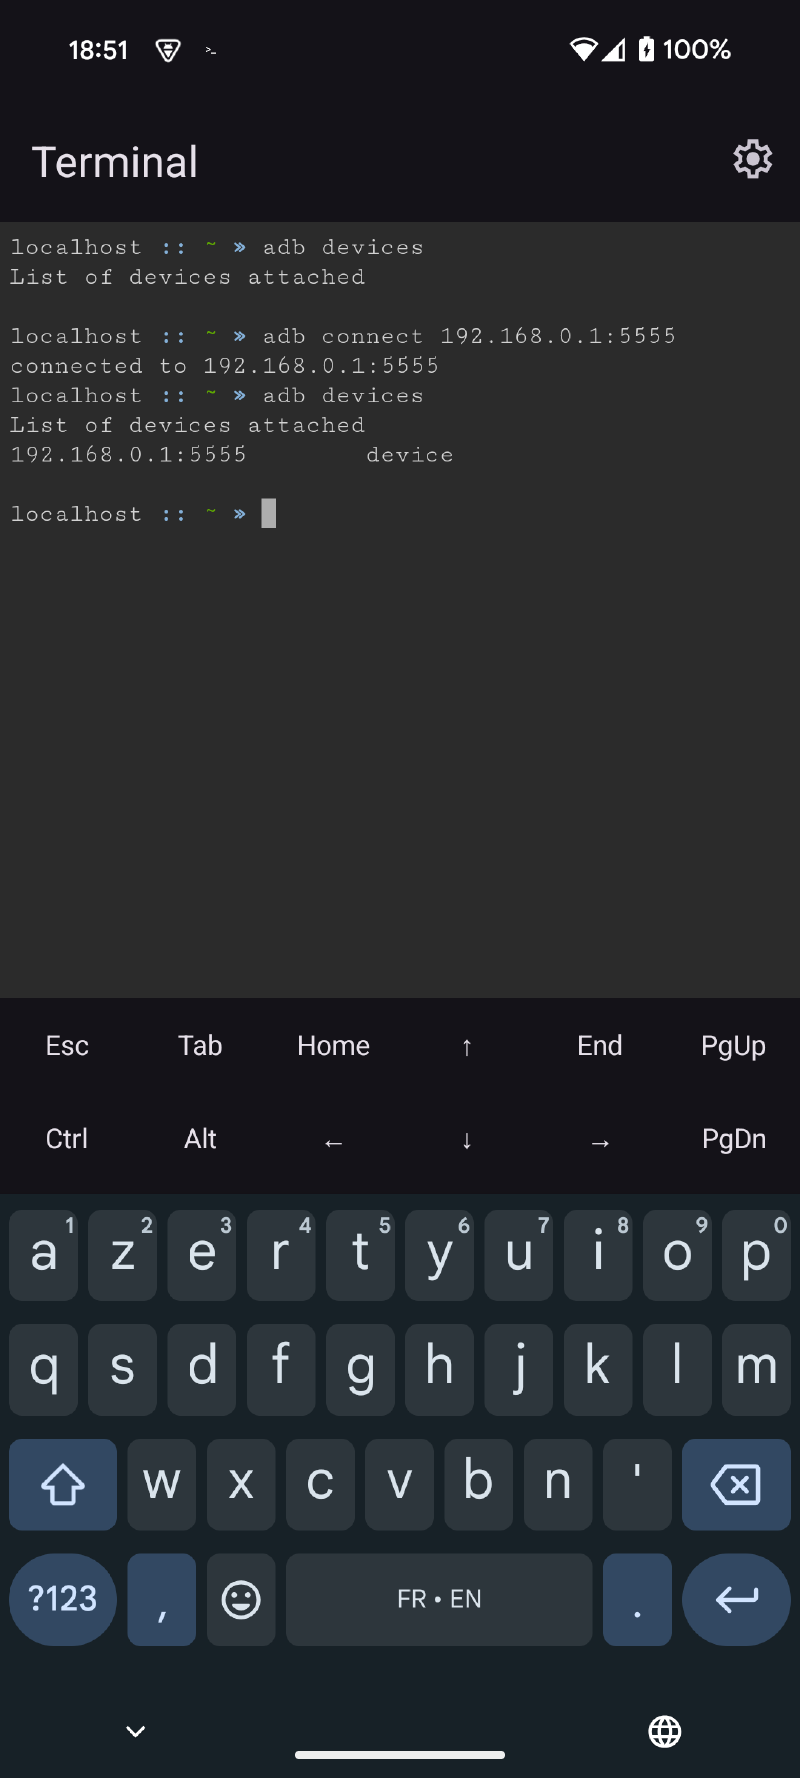
ᐅ Android communicates with the VM via a TAP interface, we will need to retrieve its IP before restarting adb in tcpip. adbd will then be accessible on this IP. Run the command adb shell ip a
Here the IP is 192.168.0.1
ᐅ Via our ADB WiFi connection, activate network adb on port 5555 (or another) and connect to it via the IP retrieved in the previous step
 |
 |
|---|
ᐅ You can now disable the WiFi connection and wireless debugging
Classic USB method #
Easier but requires a PC
USB connection to a PC with an adb client
On the PC: adb tcpip 5555
On the VM: adb connect 192.168.0.1:5555
You now have an active ADB connection between the VM and the Android system. You will lose it if you close the Terminal application. This is because the VM shuts down, and so does the ADB client. You will just need to restart adb connect on the IP of the TAP interface. However, be aware that the adb tcpip option is lost when the device is restarted. You will have to repeat the whole procedure.
Exposing SSH server #
Now that ADB commands are active from the VM, we can have some fun. We will use ADB’s port forwarding capabilities and present the VM to the outside world! Indeed, I don’t know of any Android system tool that allows this forwarding. Another possibility is to install the excellent Port Forwarder application from Gorilla Software.
We will open a port on our Pixel and link it to the VM’s ssh server (which is already configured and functional with the Debian image) via its port 22. Not having permission to open just any port on the device, I choose to open port 5000.
Ports below 1024 are considered “privileged” ports and generally require administrator rights to be used.
VM+SSH port 22 <— Android port 5000
adb reverse tcp:5000 tcp:22Thus the SSH server is accessible via port 5000 from a device on the same network as the phone.
ssh droid@192.168.1.136 -p 5000Now you have access to the Debian VM from the outside!
##Reset
This is all well and good, but there comes a time when we need to tidy up our mess. And yes, as I mentioned earlier, these manipulations make our phone vulnerable to network attacks. For example, a malicious application could be installed via adb install.
There are several ways to do this. The safest is to set adb back to USB only:
- Via the command adb usb
- With a restart
You can also keep tcpip but disable adb via the developer menu and thus find it later by reactivating it.
What’s next #
In this article, I explore some new possibilities offered by AVF. Beyond workload isolation, this framework opens up some previously closed doors.
There are avenues I would like to explore to improve the security of this manipulation. Opening the port only between the VM and adbd or using libusb for example. And why not develop an app with this AVF framework.
Thank you for reading this article to the end 😁